Share


How to Build a Custom Web App With Spreadsheets — Part 3: Deploying Using AWS

by Astha Sharma on 2021-06-21

Planning the music for an event or party can be stressful. Especially if you're the DJ & everyone attending wants their song to be played.

This is part three of a three part series about how to build a custom web app with spreadsheets.

  • Part One: Learn how to build a form and display the data. Read it here!
  • Part Two: Create a login page where the user can delete & update data. Read it here!
  • Part Three: Deploy the web app

For this part, we will go through how to deploy everything we coded using AWS!

We have a YouTube tutorial to follow along if you are a visual learner.


Deploying on Amazon Web Services (AWS)

  1. Login in or create an account on AWS
  2. Click on or search S3 and click on Buckets. Click on Create Bucket
  3. aws buckets
  4. In the Create Bucket form, name the Bucket what you want your link to say
  5. aws buckets
  6. In the same form, turn off Block all public access and then Create the Bucket
  7. aws buckets aws
  8. Go back and click on your newly created Bucket and then click on Properties
  9. aws buckets
  10. Scroll down to Static website hosting and Edit to enable it
  11. aws buckets
  12. Click on Enable and write the name of your index or main file in Index document (mine was display.html)
  13. aws buckets

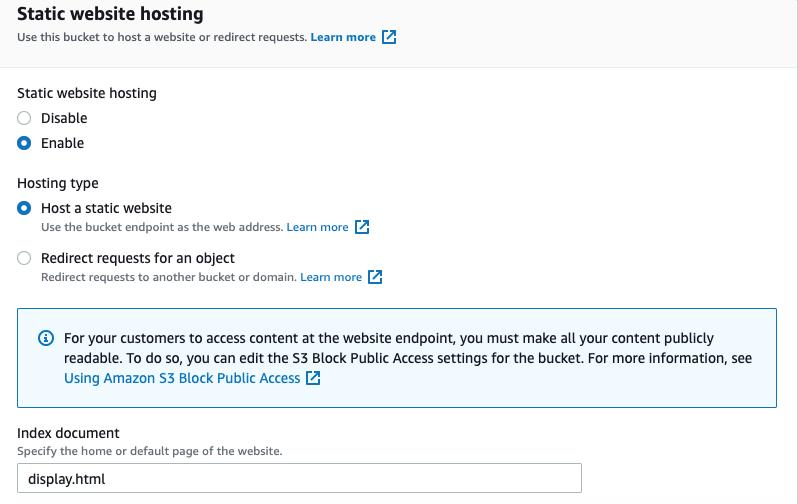
    If you have a file for errors, specify it in Error document. If not hit save changes.

  14. Add your website’s files in your Bucket folder by clicking on Upload
  15. aws buckets

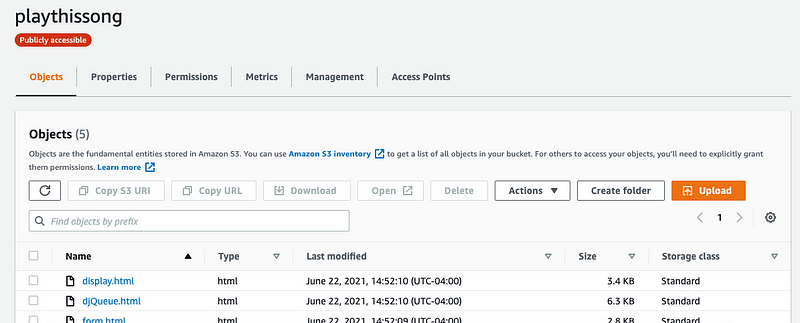
    Click on Add files to add your code

    Scroll down to Upload
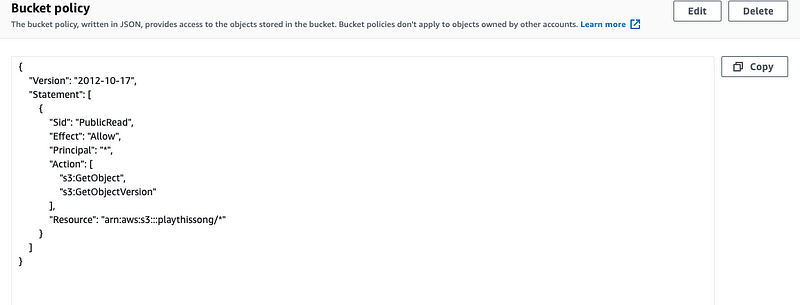
    aws buckets
  16. In your Bucket go to the Permissions and scroll down to Bucket policy and click on Edit
  17. aws buckets
  18. In here we will be pasting the following code. Click here if you want to read more about it
  19.                             
    {
        "Version": "2012-10-17",
        "Statement": [
            {
                "Sid": "PublicReadGetObject",
                "Effect": "Allow",
                "Principal": "*",
                "Action": [
                    "s3:GetObject"
                ],
                "Resource": [
                    "arn:aws:s3:::Bucket-Name/*"
                ]
            }
        ]
    }                     
                            

    Make sure to replace Bucket-Name/* with your Bucket name.

    Scroll down and hit Save Changes

    aws buckets
  20. Check to make sure the Access is Public on your S3 Buckets dashboard
  21. aws buckets
  22. Click on your bucket and go to Properties and scroll down to Static website hosting and click on the Bucket website endpoint link
  23. aws buckets

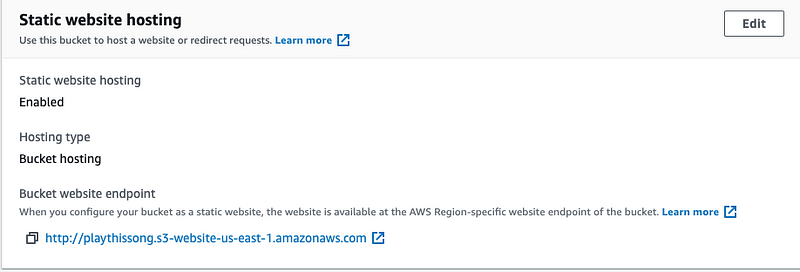
Open the URL to make sure your website is working and displaying! This is mine here!

Now you can easily share your web app for whatever projects you may need to do.


Closing Remarks

If you have any questions or run into any errors, feel free to reach out to us at info@lovespreadsheets.com!

Check out our YouTube video on this if that helps you better!


We have a more detailed tutorial with deploying custom domains you can read about here.

Good luck with your web app, let us know what you're planning to make. :)